Tuesday, June 30, 2009

Attempting to measure M5's reflectivity

Hard to leave Cape Town on a perfect winter morning like this!

Fortunately the trip back to SALT included a few highlights along the way... An impressive collection of classic cars assembled in Matjiesfontein while we were stopped there for lunch.

Then an encounter with a magnificent Martial Eagle on the road between Matjiesfontein & Sutherland :)

Up in the clean room, we got back to trying to measure the reflectivity of M5 while M4's out of the way. A laser's mounted so as to point down through the hole in the super-structure platform & a calibrated diode (connected to a picoammeter) is attached to the side of the laser to pick up the reflected beam.

To calibrate the M5 measurements we use a small reflectivity standard mounted on a bar that fits across the top of the SAC. The bar's slid into position so that the laser beam hits the reference mirror & the return's steered back up to the diode by adjusting the mirror in tip & tilt.

In principle it works, but we don't believe the results as individual sets of M5 & reference mirror measurements are practically identical & the 2 mirror surfaces are Not. So unfortunately this experiment doesn't seem possible with our current setup...

Meanwhile, next door in the spectrometer room, (amongst many other things) the RSS team's been testing the Fabry-Perot etalons before they can be re-integrated into the instrument.

The fluorescent tube in the light table produces mercury emission lines which the etalons convert into a series of rings.

Friday, June 26, 2009

Everybody should have one of these...

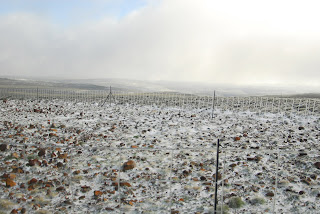
We're going back to Cape Town for the weekend, leaving behind a crisp & beautiful post-storm day.

Everything that spent the night outside acquired an interesting new texture...

Last night we were afforded a spectacular display in the workshop as the required modifications to the M5 test gear called for the Plasma Cutter!

The holes in the 3 steel plates that make up the stages for the M5 pinhole assembly had to be enlarged & by far the quickest & easiest way to do this is with a plasma torch.

Not only does it work superbly, it also looks & smells incredible! :)

Having made up a simple tool to guide the torch along the appropriate circular path, Eben (aka Plasma Man) could blast along & remove the offending rings.

The astronomers in the audience (who obviously don't get out much) stood as close as possible - bathed in sparks, inhaling deeply & both absolutely mesmerised 8)

Below you can see the ring being cut out of the plate.

Our very own 21st century blacksmith in action!

Sparks Everywhere :)

Out pops the ring - hopefully that'll be the end of the vignetting problem.

Ockert - looking regal in his winter finery - set about buzzing off all the rough edges.

In the spirit of the Astronomer Development Programme, Dr O'Donoghue got to have a go & demonstrated his aptitude as a graffiti artist...

Not bad at all!

Wednesday, June 24, 2009

Then came the snow, & a surprising visitor!

Yesterday's cold, wind & rain gave way to more cold, more wind & some snow...

Much to our amazement, we found a frog in the back corner of the clean room this morning! It's way too cold to put him outside so he spent the day (appropriately kitted out) exploring the inside of a bucket until it was time to go home with uncle Francois.

Tuesday, June 23, 2009

A blustery day in Sutherland

It's 2 days after the winter solstice & things are turning ugly... 2 huge cold fronts on the way - starting with ferocious winds exceeding 120km/h!

There's only 1 thing to do: go outside & play, of course :) Ockert, getting blasted in the process, took this movie of Eben & Amanda "wind-surfing" behind SALT!


The 3 lunatics then set about circumnavigating the dome - Eben clockwise, Ockert & Amanda anti-clockwise. Their trajectories closely resembled those of protons being flung out of a particle accelerator & all earned style points for their creative decelerations - ouch ;)

Meanwhile, an alarming scene unfolded in the lounge: a mechanical engineer dabbling in electronics... This photo carefully conceals the individual's identity.

Having attached our fancy new adjustable LED, we got a wavefront measurement of M5 (0.1 waves RMS). With that, the M5 test's fully commissioned :)

In this test, a pinhole placed at M5's one focus is imaged at the mirror's other focus. What's really neat is to remove the wavefront camera & look down through the hole in the super-structure platform & see the pinhole "floating" in mid air! We used a small flat mirror to make it a little easier to photograph the image of the pinhole.

The bull's eye on the CGH can only be seen with a microscope so it won't allow us to centre the CGH when we do the system test. But it can be used to set up crosshairs which will be visible to the interferometer, so Amanda kindly donated two 50 micron strands to the cause & Francois's making good progress with that...

Monday, June 22, 2009

First light for the M5 test!

Once the Z-actuator, LED & diffuser had been set up, the pinhole assembly could be attached to the XY stages & the M5 mirror cover removed.

The ooohs & aaaahs began as soon as the direct camera was connected :)

Moving the pinhole around allows you to fix coma...

Then focusing the camera shows that there's still lots of spherical aberration so the pinhole needs Z adjustment.

This stuff's Just So Cool!

Meanwhile, over on the optical bench, having the microscope on a solid XY stage assembly made it much easier to hunt around on the CGH...

The last thing we expected to find was features that look like little staircases dotted along in one radial direction - no idea what they're about!

Then at last we found the markings we'd been looking for - spaced out in 2 perpendicular radial directions.

Who knows what other info's encoded on that surface... we're hoping for some good potjiekos recipes ;)

Sunday, June 21, 2009

Assembling the M5 test gear

The next major step will be to test M5. James finished designing the fixturing last week & the bits were subsequently manufactured in Cape Town.

With M4 safely in its box, the pinhole mount & its associated XY stages could be assembled & integrated. The stages are supported by a ring & vanes that attach to the M4 mounting points.

The X stage went on next, then the Y one.

The M5 test's pinhole assembly is similar to the M4 spider & will attach to brackets on the Y stage.

Z adjustment of the pinhole is achieved with a pair of 200 micron thick laser-cut carbon fibre flexures.

The LED light source & ground glass diffuser slot in through the side of the tube that holds the pinhole.

Here's the whole lot screwed together...

While we were in Cape Town, Francois set up a microscope to explore the CGH, in search of the elusive reference marks reputed to exist on the surface.

Instead of the tiny marks at intervals across the CGH, he found a "bull's eye" at the centre that will be invaluable later on for aligning the CGH for the system test! The image below shows a minute portion of the centre of the CGH - keep in mind that there are ~24 thousand rings on the surface, not many of which are shown here. The origin of the offset ring remains a mystery...

Sunday, June 14, 2009

Hasta luego amigos!

Time for our visitors from the north to head back to their telescope - so long & thanks for all the Zernikes!

We did promise to show Hanshin a Verreaux's (aka Black) eagle while he was here - this one obliged with a nifty fly-by about 30 km outside Matjiesfontein :)

The trip back also included loads of spectacular waterfalls all over the Drakenstein mountains.

The usual suspects will return to SALT a week from now if all the new gear for the M5 test is ready by then...

Friday, June 12, 2009

And Then... there were 3!!

Today the scalpel finally went in! Or perhaps it was Saint George plunging his sword into the dragon? Either way - it was a big day... the first major mechanical intervention & with that, the end of optical innocence!

Having made all the measurements & carried out all the tests we could stand, it was time have a go at removing M4. This will be necessary for the M5 test that will allow us to evaluate the surface figure of M5 (coming soon to a Karoo clean room).

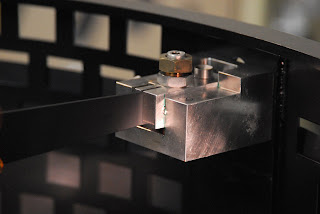
The mounting blocks for the 3 vanes of the M4 spider each have bolts for tangential & radial adjustment, as well as non-adjusting Z-bolts that secure the desired vertical location. These all had to be undone & removed before the mirror could be extracted.

First the tangential bolts were undone...

Then the radial ones...

& finally the Z-bolts.

With all the bolts removed, M4 & its vane assembly could be lifted out of the SAC & relocated to its cozy new box where it spent the night.

Behold - our new 3 mirror corrector!